


Tail Light Tint Explained: Film vs Spray vs Pre-Cut Vinyl Overlays

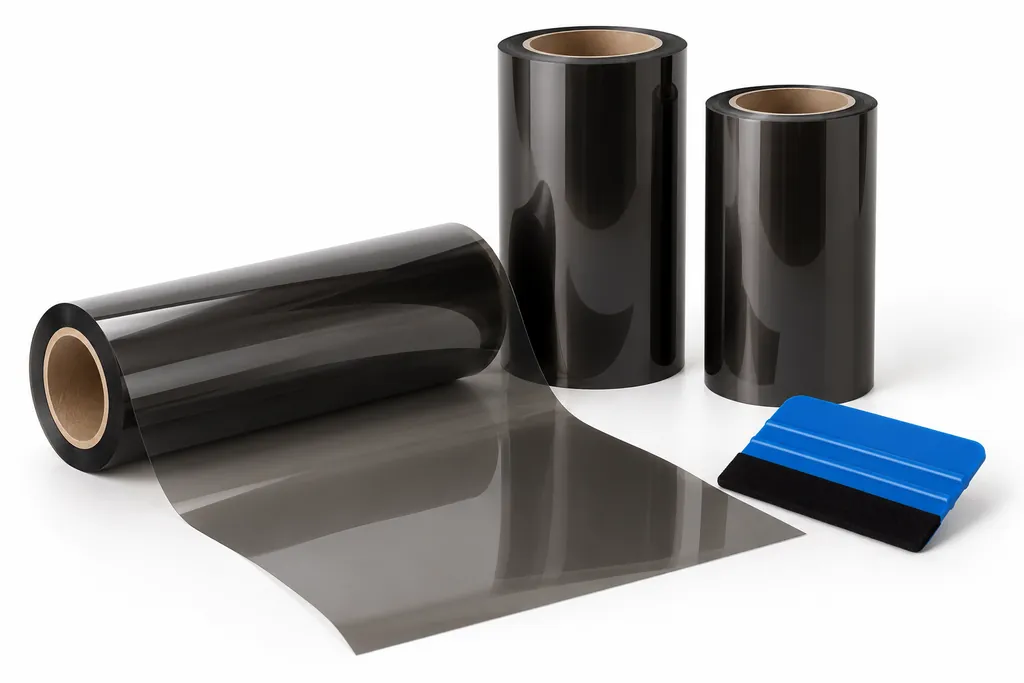
Tail light tint darkens your tail lights with a thin layer of film, vinyl or spray. There are three ways to do it: spray tint (cheap but close to permanent), tint film from a roll (flexible but you cut it yourself) and pre-cut vinyl overlays (made for your exact car, so there is nothing to cut and they are the easiest to install). For most owners, a pre-cut overlay gives the cleanest result with the least risk.
We make pre-cut tail light tint kits for Dodge, Honda, Subaru and Toyota models, so we have tinted a lot of tail lights. This guide compares all three methods honestly: what each one costs, how long it takes, how it looks and how hard it is to undo. Then we show you how to tint tail lights without bubbles, step by step.
In this guide
- What tail light tint is and the three ways to do it
- Pre-cut vinyl overlays
- Wet vs dry application
- Tail light tint spray
- Tail light tint film
- Light smoke vs dark smoke
- Is tail light tint legal?
- Does tint reduce brightness?
- How to tint tail lights without bubbles
- How long it lasts and how to remove it
- Tail light tint kits by car
- FAQ
What tail light tint is and the three ways to do it
Tinted tail lights are factory tail lights with a darker layer over the lens. A good kit usually covers the whole tail light, not just the red part: the tail and brake light, the turn signal and the reverse light sections. When the lights are off, the tail lights look smoked or almost black. When they are on, the light still shines through, just a little less bright. It is one of the cheapest ways to make the back of a car look more finished.
There are three ways to tint tail lights, and they are very different jobs:
| Spray tint | Tint film (roll) | Pre-cut vinyl overlay | |
|---|---|---|---|
| Typical cost | $10–$40 (paint, clear coat, sandpaper) | $15–$40 per roll | $15–$40 per kit |
| Time | A weekend (tail light removal recommended, several coats, drying) | 2–4 hours | About 30 minutes |
| Skill needed | High. Even coats are hard. | Medium. You cut and stretch it yourself. | Low. No cutting. |
| How it goes on | Sprayed in coats | Wet or dry, depends on the film | Wet or dry, depends on the kit (ours go on dry) |
| Can you undo it? | Hardly. Usually needs sanding. | Yes, it is not permanent. | Yes, it is not permanent. |
| Finish | Can be great, often blotchy on a first try | Good if the edges are cut cleanly | Even shade, clean edges |
| Legal risk | Highest, because you can’t remove it before an inspection | Medium | Medium |
If you would rather not do it yourself, most tint and wrap shops will tint tail lights for you. Expect to pay from about $100 for spray or film, and more for cars with several lenses or deep curves.
Below we go through each method, starting with the one we recommend to most people.
Pre-cut vinyl overlays: the fit-and-forget option
A pre-cut overlay (also called a tail light tint kit or tail light wrap) is automotive vinyl that has been cut by machine to the exact shape of one car’s tail lights. You don’t measure or cut anything. You peel off the backing, line it up with the edge of the lens and press it on.
Our vinyl has tiny air-release channels in the adhesive, which not every brand has. You can’t see them once it is on, but they give trapped air a way out, so you can push bubbles to the edge with a squeegee instead of fighting them. Each piece in our kits is labeled with its position, and every kit comes with install instructions made for your car model, a spare piece to practice on, a squeegee and a microfiber towel.
The downsides: you can only buy a pre-cut kit for cars someone has made one for, and you get the shade that kit comes in. Our kits come in one dark shade, which looks almost black when the lights are off and still shows red when they are on.
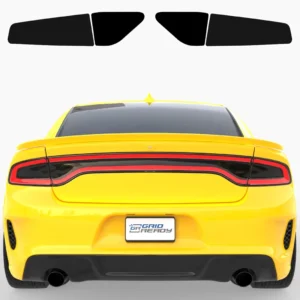
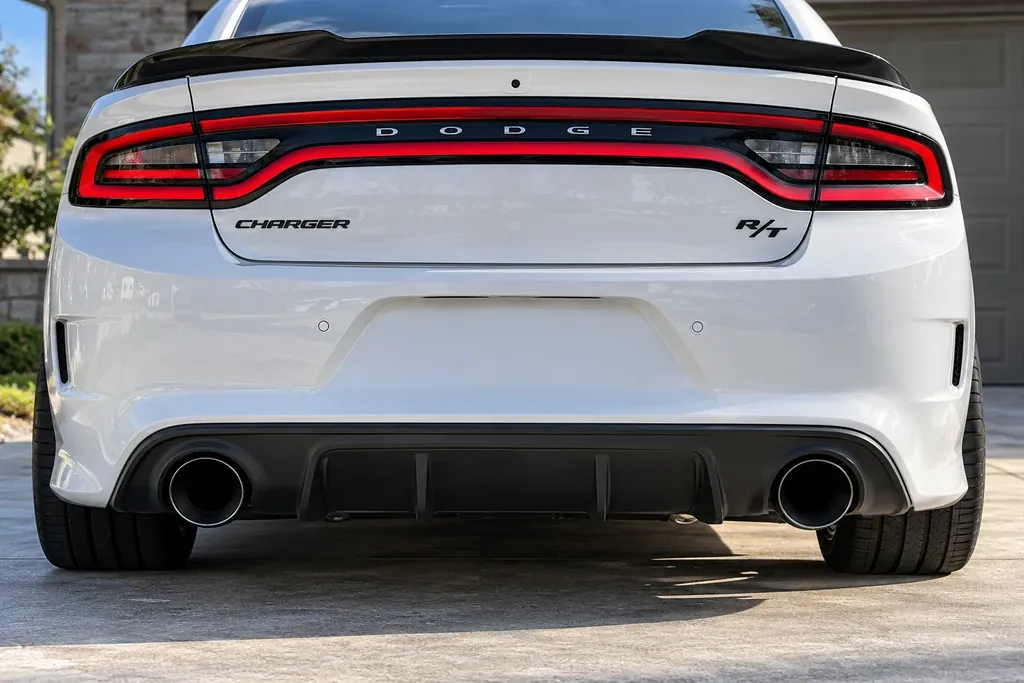
For Dodge owners, we make a pre-cut tail light tint kit for the 2015–2023 Dodge Charger, and the same kind of kit for the 2015–2023 Dodge Challenger and the 2014–2027 Dodge Durango.
GridReady product
Dodge Charger Tail Light Tint Kit
- Fits every 2015–2023 Charger, SXT to Hellcat
- Pre-cut dark vinyl with air-release channels
- Squeegee, towel, practice pieces and install instructions included
Other brands sell pre-cut kits too, for example Lamin-x, which covers many common cars. Whoever you buy from, check that the kit is made for your exact model years, because tail light shapes often change with a facelift.
Wet vs dry application: which is better for tail lights?
Vinyl and film for lights are made to go on in one of two ways, and using the wrong one is the most common reason an install goes wrong. Check which one your kit or film is made for before you start. The short answer for tail lights: dry application is the better choice.
Wet application
With a wet install, you spray the lens and the sticky side of the film with a slip solution (water with a drop of baby shampoo). The film floats on the water, so you can slide it into position, and then you squeegee the water out from under it. This is how window tint is installed. For tail lights, wet application is mostly used by cheap, lower-quality films and kits: thinner film with a weaker adhesive that needs the water to be positioned at all.
- Good: very forgiving while you position the film.
- Not so good: the film looks hazy until the water under it has dried out, which can take several days. Until then the adhesive is weak, so edges on a curved tail light can lift. Water that is left under the film shows as small blisters, and it can creep around the edge of the lens. Cheap wet-install film also tends to fade, peel or shrink sooner.
Dry application
With a dry install, no water is used at all. You peel the backing and press the vinyl straight onto a clean, dry lens. Dry application vinyl is usually the higher-quality option: thicker automotive vinyl with a stronger adhesive, made to handle sun, rain and car washes for years. It is also easier to install, because there is no water to squeegee out and nothing to wait for. The best dry vinyl, like the vinyl in our kits, also has tiny air-release channels in the adhesive, so air escapes when you squeegee it instead of getting trapped. Many cheaper films don’t have them, so check before you buy.
- Good: higher quality, easier to install and longer lasting. It grabs right away, looks finished as soon as you are done, and there is no water to dry out. You can wash the car after 72 hours.
- Not so good: it doesn’t slide, so you line it up before you press it down. You can lift it gently and try again, which is why our kits include a practice piece.
Never install a dry application vinyl wet. The water gets trapped under the vinyl, the adhesive can’t bond to the lens, and you end up with bubbles and edges that lift. All of our pre-cut tail light kits are dry application vinyl with air-release channels, so leave the spray bottle in the garage. On a curved tail light we prefer dry for this reason: it sticks properly right away, and you don’t have to wait days to see whether water is still trapped under it.
Tail light tint spray: VHT Nite-Shades and Plasti Dip
Spray tint is a see-through paint for lenses. The best-known product is VHT Nite-Shades, and Rust-Oleum also makes a lens tint spray. You spray several light coats onto the lens, let it dry and usually finish with a clear coat for a glossy look.
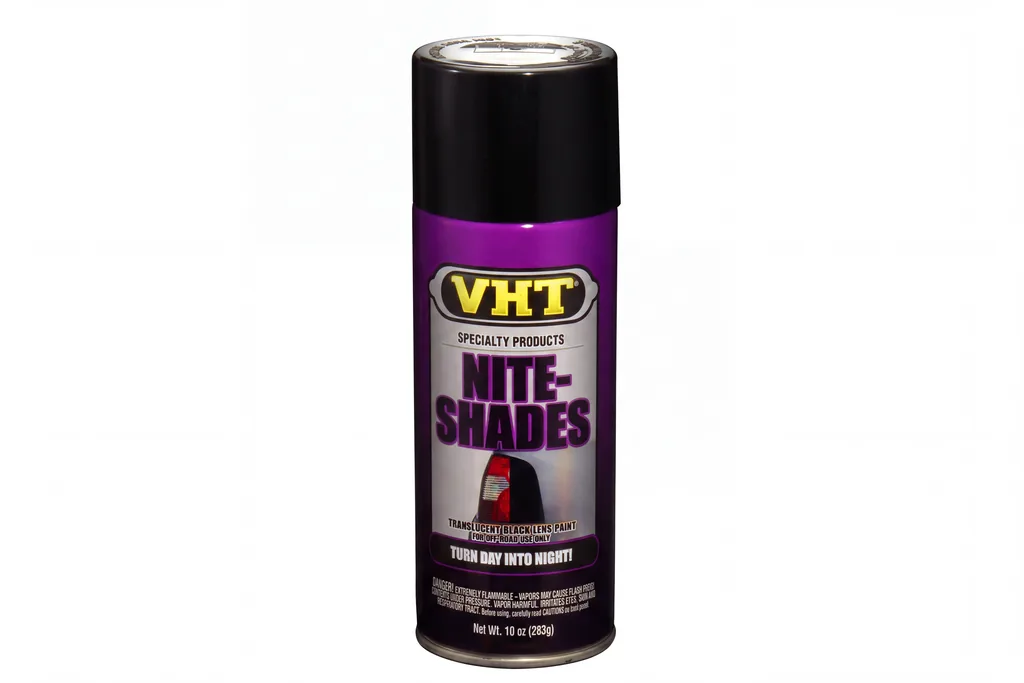
It sounds easy, and it is where most bad tint jobs come from. To do it well, you take the tail lights off the car, clean and lightly sand the lenses, mask off anything you want to keep clear, then spray thin, even coats about 10 minutes apart. One heavy coat or a gust of wind gives you runs and dark patches, and on a big light like a Charger’s racetrack light, uneven spots are easy to see.
The bigger issue is that it is close to permanent. VHT itself says Nite-Shades can’t be removed from a plastic lens in a satisfying way. Getting it off usually means wet sanding and polishing the lens. VHT also labels the product for off-road and show use, which tells you something about how it fits with road laws.
Plasti Dip is the other spray people use. It is a rubber coating that peels off later, which is its main advantage. The downsides are a matte, rubbery look unless you add a gloss top coat, and edges that tend to lift and peel after a while.
Spray makes sense if no pre-cut kit exists for your car, you have a garage and some painting experience, and you want a permanent result. For everyone else, it is the riskiest option.
Tail light tint film: flexible, but you do the cutting
Tint film is sold in sheets or rolls in different shades, from light smoke to almost black. Lamin-x, VViViD and 3M all sell film that is used on lights. Because you cut it yourself, it fits any car, and you can pick exactly how dark you want to go. Film also comes in colors (red, blue, yellow) and patterns such as honeycomb and carbon fiber, if you want something other than smoke.
The work is in the cutting and stretching. If your tail lights are curved, the film has to be warmed with a heat gun and stretched over the lens, then trimmed along the edge with a sharp blade. That is where things go wrong: a slip of the knife can scratch the lens or the paint next to it, and an uneven edge is easy to spot. Film also takes practice to lay down on a deep curve without wrinkles.
If you have wrapped car parts before, film is a good option and gives you more choice of shade. If this is your first time, plan for a ruined piece or two and buy extra.
Light smoke vs dark smoke: how dark should you go?
How dark a film is, is measured in VLT (visible light transmission): the percentage of light that still gets through. The lower the number, the darker the tint. Spray works differently: it gets darker with every coat you add.
Tint comes in roughly three levels:
- Light smoke (around 50% VLT): the lens still looks red when the light is off, just deeper and darker. It is the safest choice if your state is strict or you drive a lot at night.
- Medium smoke (around 35% VLT): the red turns to a dark cherry color. A popular middle ground.
- Dark smoke (around 20% VLT): the lens looks nearly black when off, which gives the strongest look. It also cuts the most light, so it is the level most likely to get you pulled over.
- Blackout (5% VLT or less): the lights are hard to see even when they are on. This is for show cars only, never for driving on the road.
Our advice: the darker the tint, the more it matters that the tail lights are LED and bright from the factory. Most newer Dodge, Honda, Subaru and Toyota models have LED tail lights, which handle tint much better than old bulb lights do. And if you are not sure, choose something that can be removed easily. Our kits come in one dark smoke shade.
Is tail light tint legal?
The short answer: it depends on your state, and the law is stricter than most people think. Most states say tail lights must show red and be visible from a set distance behind the car, often 500 or 1,000 feet. Some states go further and ban any material over a lamp, no matter how light. Federal rules (FMVSS 108) set how bright lights must be when a car leaves the factory, and dark tint can bring them below that.
In practice, light tint rarely causes trouble. Dark tint can get you a ticket in a strict state, and it can fail a safety inspection. We are working on a full state-by-state guide to tail light tint laws. Until then, check your state’s vehicle code before you go dark. This is not legal advice, and the rules change.
Does tail light tint reduce brightness or visibility?
Yes, every tint reduces brightness. That is simply how it works: the darker the layer, the more light it absorbs. What matters is how much is left.
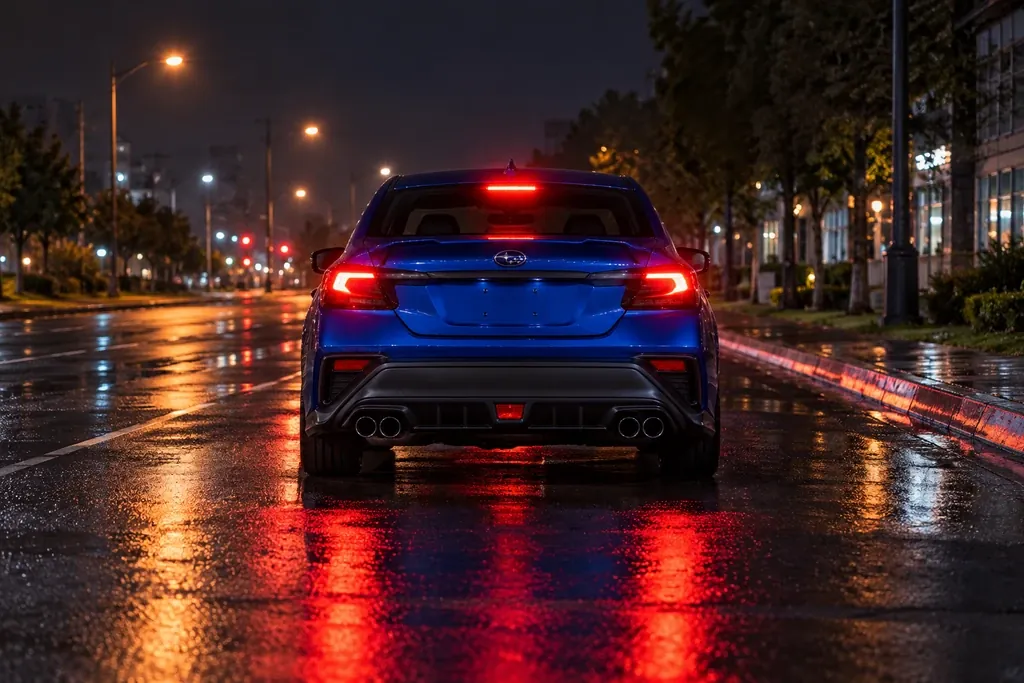
On a modern LED tail light, a quality tint still leaves the brake lights clearly visible from behind, day and night. On an older light with regular bulbs, dark tint can make the brake light hard to see in bright sunlight, which is a real safety problem. So check it yourself: after the install, have someone press the brake while you stand behind the car in daylight. If you have to look twice to see it, the tint is too dark.
How to tint tail lights without bubbles (step by step)
Here is how to install tail light tint, step by step. With a pre-cut kit like ours, you skip the two cutting steps (2 and 8), and the whole job takes about 30 minutes. With film from a roll, you do every step. The wet steps before step 4 are only for wet application film. Our kits are dry install, so you skip those too.
Before you start, pick the right spot: a garage or the shade on a mild day. Vinyl doesn’t stick well when it is cold, and it gets too soft and stretchy in direct sun. You need isopropyl alcohol, a squeegee, a microfiber towel and a heat gun or hair dryer. The squeegee and towel come with our kits, together with install instructions made for your exact car model.
Step 1: Clean the tail light
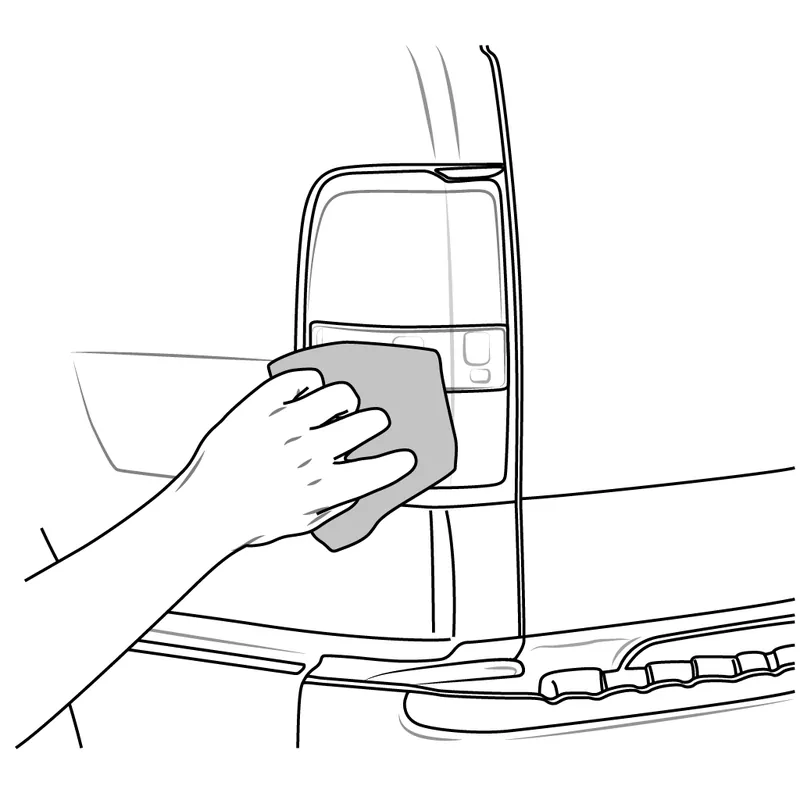
Wash and dry the tail light, then wipe it with isopropyl alcohol to remove wax and grease. Any dust left under the vinyl will show as a bump.
Step 2: Cut the film to shape (film from a roll only)
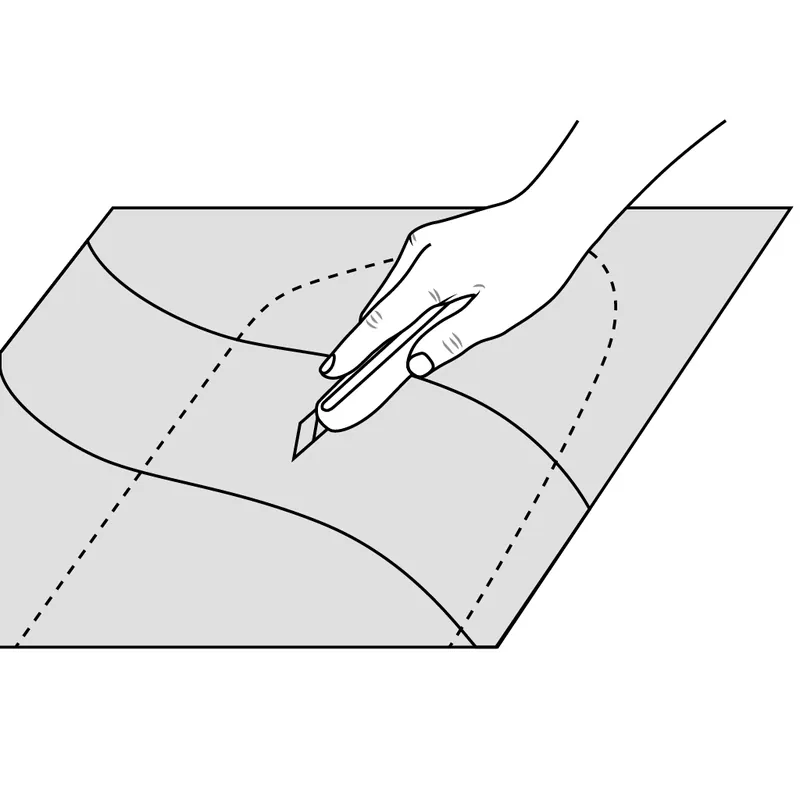
Cut a piece of film roughly to the shape of the tail light, with a few inches of extra film all around. The vinyl often has to be stretched around the corners and curves of the light, so make sure you have enough to hold on to. You trim it to the exact edge later. With a pre-cut kit you skip this step: every piece is already cut to the exact shape of your light and labeled with its position, and the install instructions for your model show where each piece goes.
Step 3: Peel the tint from the backing paper
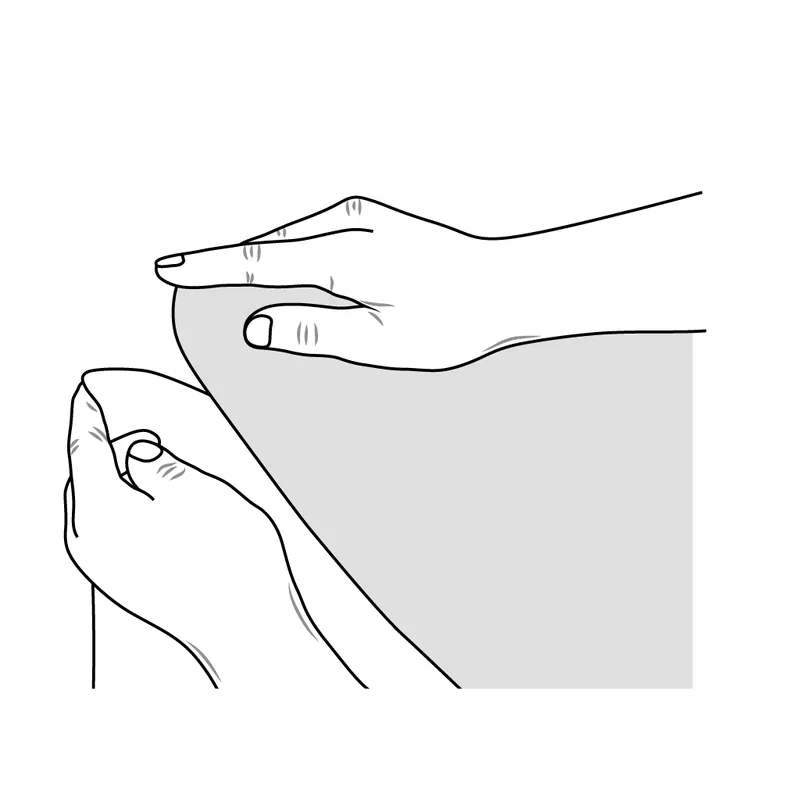
First hold the piece in place with the backing still on, so you know exactly where the edges go. Then peel the backing off slowly, without letting the sticky side fold onto itself. With our kits, try the practice piece first on a flat part of the lens to get a feel for how the vinyl sticks and lifts again.
Wet application only: wet the tail light and the film before step 4
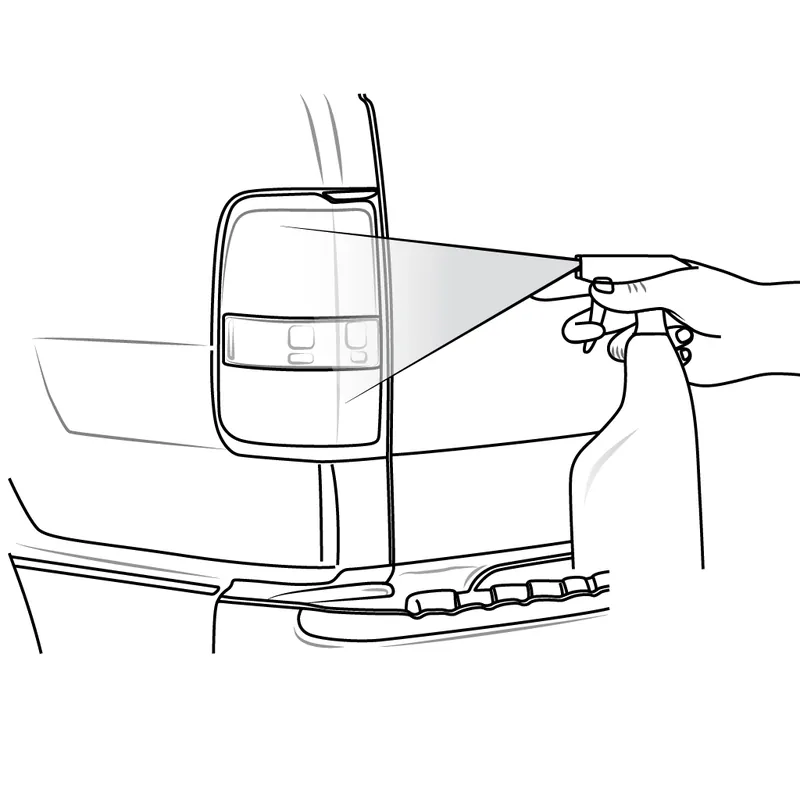
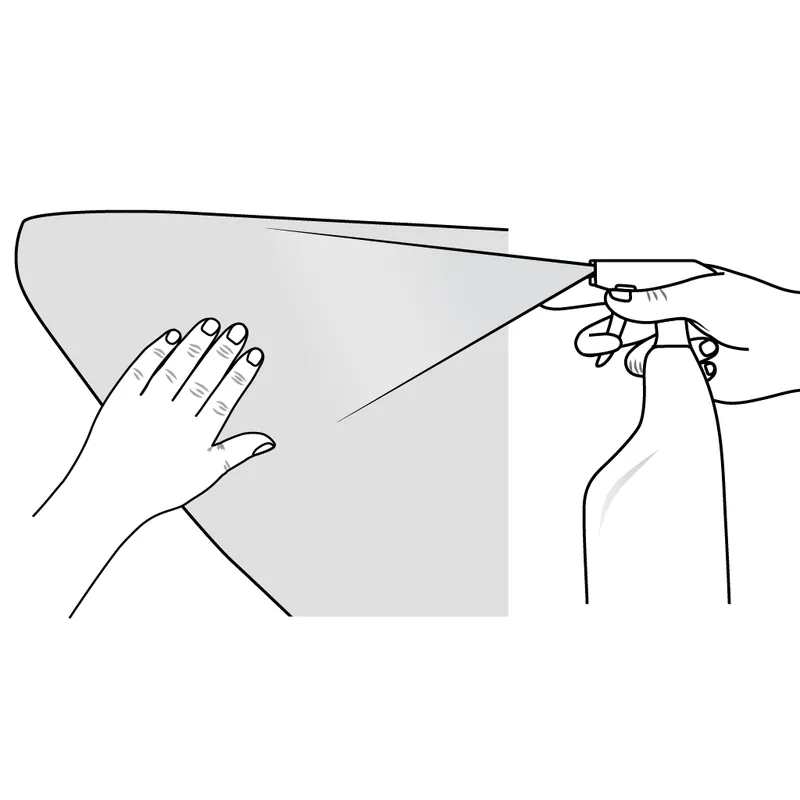
Wet application film needs a slip solution (water with a drop of baby shampoo). After peeling off the backing, spray the lens and the sticky side of the film, then position the film in step 4. The water lets the film slide into place. Skip these steps with dry vinyl like ours: water under a dry install vinyl stops the adhesive from bonding.
Step 4: Position the tint on the tail light
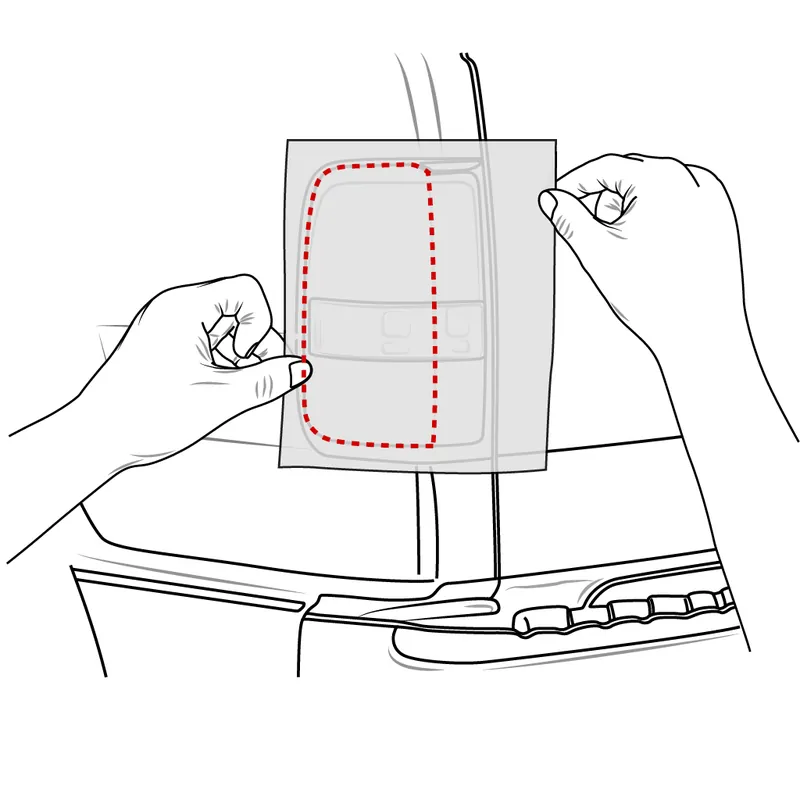
Lay the piece on from one edge and line it up with the edge of the lens. Press lightly at first. Dry vinyl grabs right away, but if it is crooked you can lift it gently and try again.
Step 5: Squeegee from the center outwards
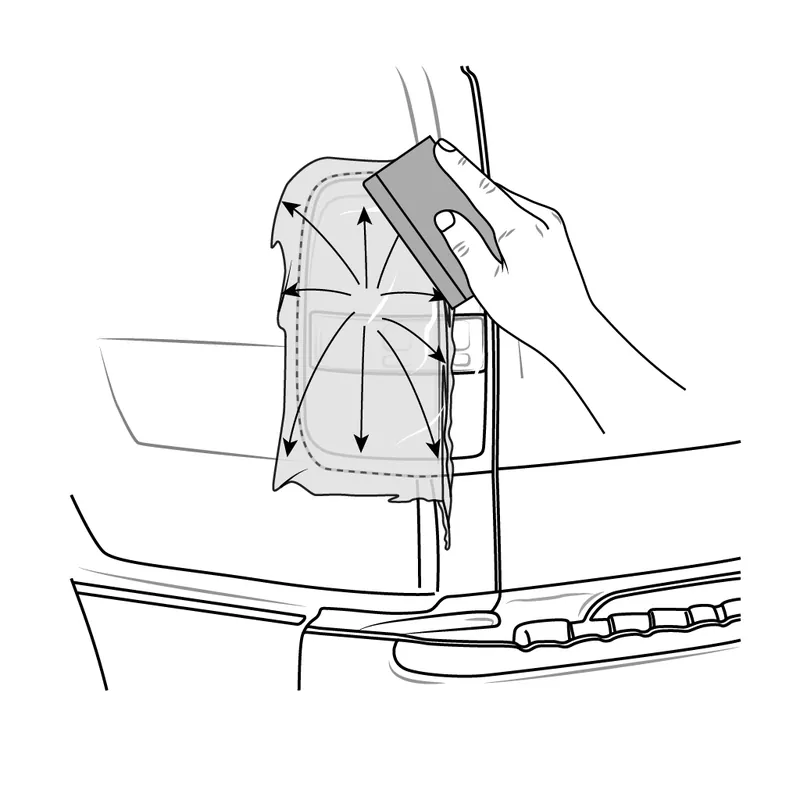
Start in the middle of the light and work toward the edges in overlapping strokes. This pushes the air (or the water, on a wet install) out from under the vinyl instead of trapping it in the middle.
Step 6: Heat the curves and edges
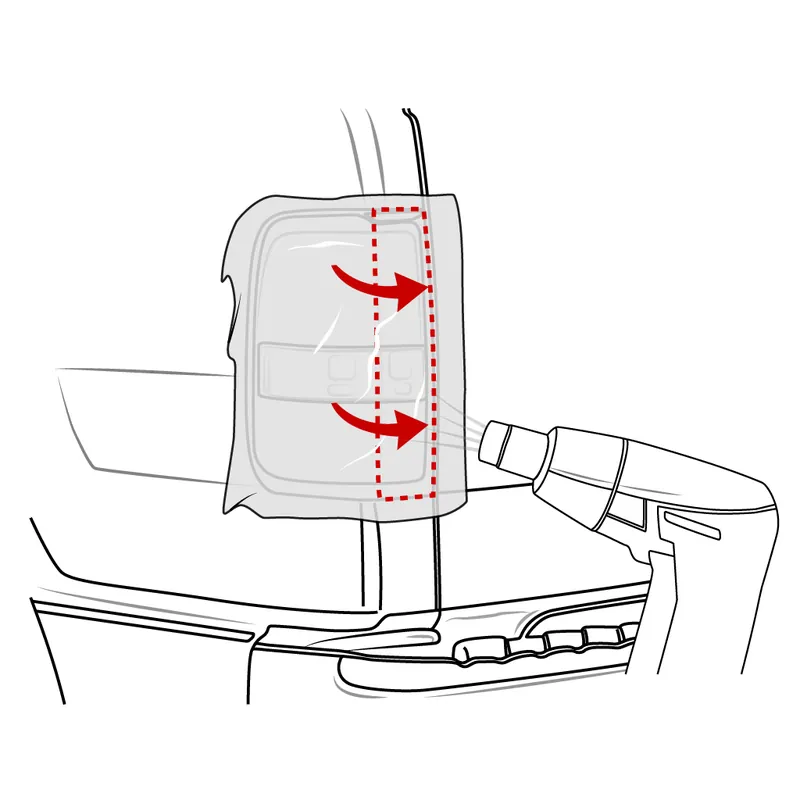
If your tail lights are curved, warm the vinyl with a heat gun on a low setting, or a hair dryer, to make it soft enough to follow the shape. Keep the heat moving so you don’t overheat the lens, then press the warm vinyl down. Hold the heat gun far enough away that the heat doesn’t burn or hurt your hand. If it is too hot, the heat gun is too close and you can damage the vinyl.
Step 7: Squeegee the air bubbles out
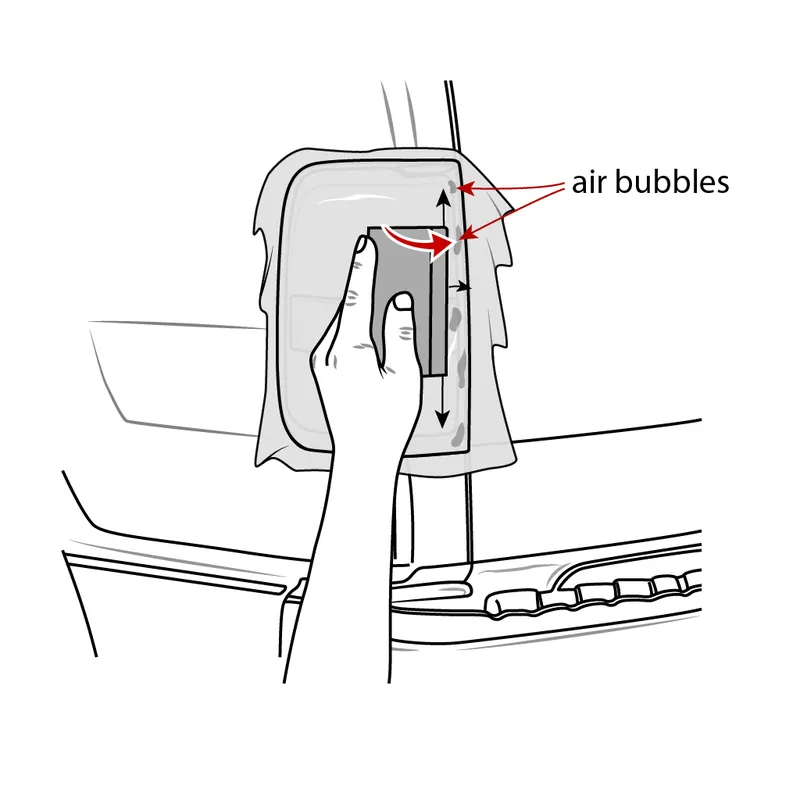
Push any bubbles to the nearest edge with the squeegee. Our vinyl has air-release channels in the adhesive, so the air finds its way out and small bubbles disappear with a few strokes. A tiny bubble left after the install often disappears on its own within a few days. If one stays, prick it with a fine pin and press the air out.
Step 8: Trim the excess film (film from a roll only)
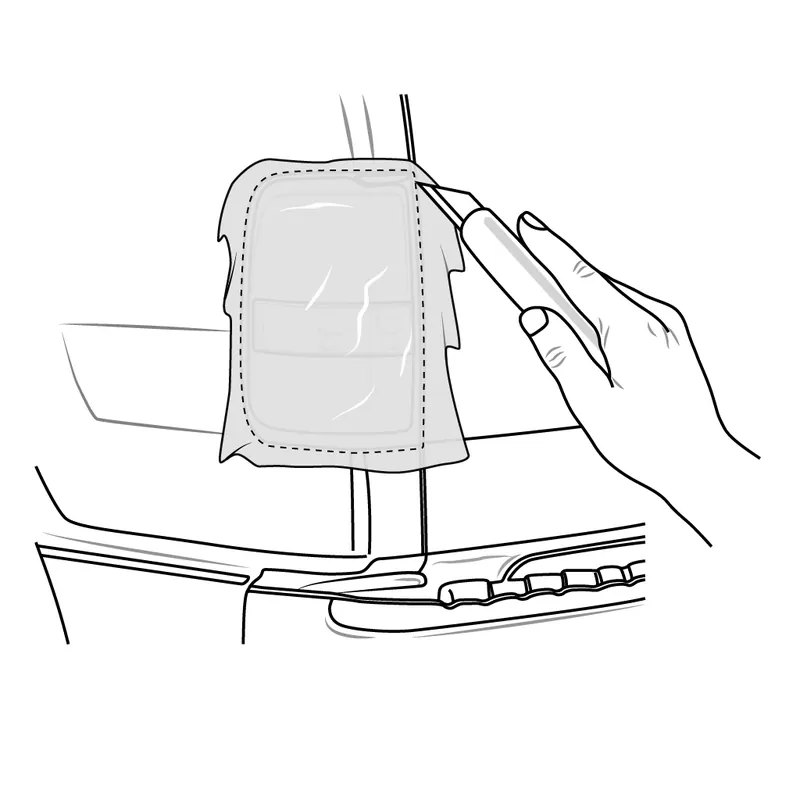
Run a sharp blade along the edge of the lens to cut off the extra film. Go slowly: a slip of the knife can scratch the lens or the paint next to it, and an uneven edge is easy to spot. With a pre-cut kit there is nothing to trim.
Step 9: Heat and squeegee the edges one last time
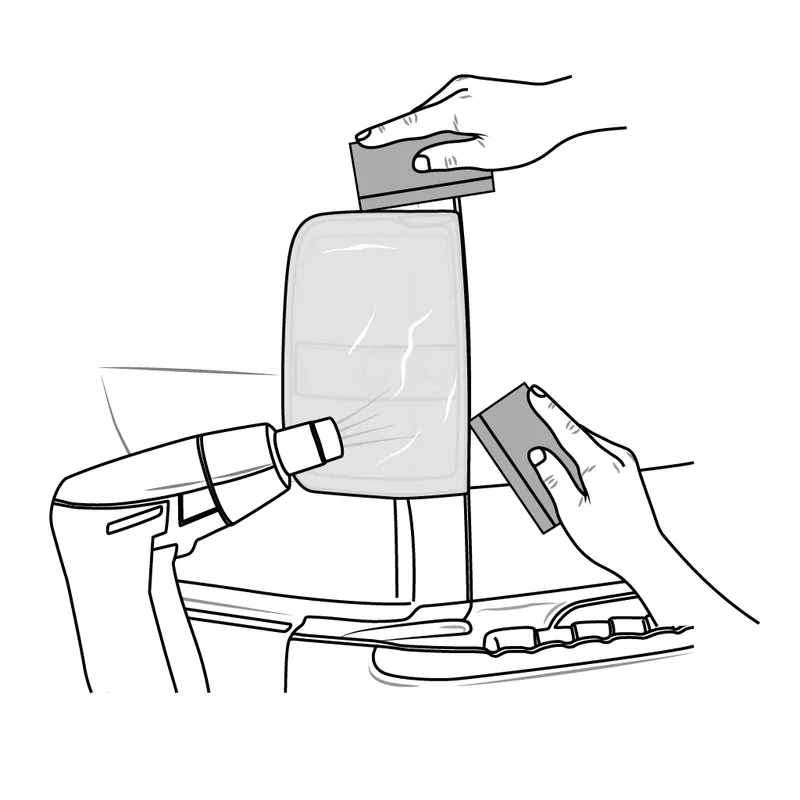
Go around all the edges once more with a little heat and the squeegee (wrap the microfiber towel around it), so the vinyl sticks properly and the edges can’t lift.
Step 10: Don’t wash your car for 72 hours
Once the install is complete, leave the tint alone and don’t wash your car for the first 72 hours. The adhesive needs that time to bond fully to the lens. After that you can wash the car as normal, but don’t point a pressure washer straight at the edges of the tint.
How long does tail light tint last, and can you remove it?
How long it lasts: good automotive vinyl usually lasts several years on a car that is washed regularly. The things that shorten its life are strong sun all year, harsh chemicals and a pressure washer aimed at the edges. Spray tint lasts as long as its clear coat. Cheap film and Plasti Dip can fade, crack or peel within a year or two.
How to remove vinyl tint or an overlay:
- Warm the vinyl with a hair dryer for a minute so the adhesive softens.
- Lift one corner with a fingernail or a plastic trim tool, never a metal blade.
- Pull slowly, folding the vinyl back on itself at a low angle.
- Remove any leftover adhesive with isopropyl alcohol or an adhesive remover that is safe for plastic. Don’t use acetone, because it can damage plastic tail light lenses.
Removing spray tint is a different job. Plasti Dip peels off. VHT Nite-Shades and similar paints usually need wet sanding with fine paper and then polishing to bring the lens back to clear. It can be done, but it takes hours and you can easily leave the lens hazy.
Tail light tint kits by car
All of our kits are pre-cut dark vinyl with air-release channels, and each one comes with model-specific install instructions, a squeegee, a microfiber towel and spare pieces. You can see every kit, for tail lights, side markers, reflectors and more, on our pre-cut tint kits page.
Dodge
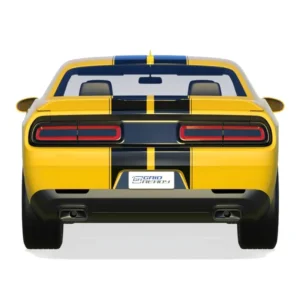
The Charger kit is shown above. The Challenger kit also includes pieces for the side markers and reflectors, so the whole car matches (the side marker pieces fit the standard body, not the Widebody).
GridReady product
Dodge Challenger Tail Light Tint Kit
- Fits the 2015–2023 Challenger
- Covers the tail lights, side markers and reflectors
- Labeled pieces, install instructions, squeegee, towel and extras included
The Durango has a full-width racetrack tail light like the Charger. Our Durango kit tints the inner sections, which gives the rear of the car a darker, meaner look.
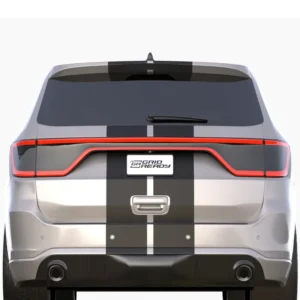
GridReady product
Dodge Durango Tail Light Tint Kit
- Fits the 2014–2027 Durango
- Pre-cut dark vinyl with air-release channels
- Labeled sections and extra practice overlays
If you are building up a Charger, our Dodge Charger mods guide shows what to do after the tint.
Honda, Subaru and Toyota
- 2022–2027 Honda Civic sedan tail light tint
- 2018–2022 Honda Accord tail light tint
- 2022–2026 Subaru WRX tail light tint
- 2019–2027 Toyota Corolla sedan tail light tint
- 2019–2022 Toyota Corolla hatchback tail light tint
- 2021–2027 Toyota GR86 tail light tint
Don’t see your car? Tint film from a roll is the next best option, and spray is the last resort.
FAQ
Is tail light tint legal?
It depends on your state. Most states require tail lights to show red and be visible from a set distance, and some ban any cover over a lamp. Light tint is less likely to cause problems than dark tint. Check your state’s vehicle code before you install it.
Does tail light tint reduce brightness?
Yes. Any tint absorbs some light, and darker tint absorbs more. Modern LED tail lights are bright enough that a quality tint still leaves them clearly visible, but they will never be as bright as an untinted lens.
Can you remove tail light tint?
Vinyl film and pre-cut overlays can be removed easily. Warm them with a hair dryer and pull slowly. Plasti Dip also peels off. Spray tint like VHT Nite-Shades is close to permanent and usually needs sanding and polishing to remove.
How long does tail light tint last?
Good automotive vinyl usually lasts several years on a car that is washed regularly. Spray tint lasts as long as the clear coat over it. Cheap film and Plasti Dip can fade or peel within a year or two.
Will tinted tail lights pass inspection?
In states with safety inspections, an inspector can fail lights that are too dark or no longer show red. Light tint usually passes. With dark tint, a removable overlay lets you remove it before the inspection.
What is the difference between smoked tail lights and tinted tail lights?
Smoked tail lights are complete replacement lights with a dark lens built in. Tinted tail lights are your factory lights with a film, overlay or spray coating on top. Tint costs far less and can usually be undone.
Is spray tint or vinyl better for tail lights?
For most people, vinyl. A pre-cut vinyl overlay gives an even finish, needs no painting skills and can be removed easily later. Spray tint can look great, but it takes practice, the lights usually have to come off the car, and it is hard to undo.
Should you apply tail light tint wet or dry?
Follow what the product is made for. Dry application vinyl, like our pre-cut kits, must go on dry: water gets trapped under the vinyl and the adhesive can’t bond. Wet application film is sprayed with a slip solution, slid into place and squeegeed out, and needs a few days to dry clear.
What VLT should tail light tint be?
VLT is the percentage of light the tint lets through. Around 50% is a light smoke, around 35% a medium smoke and around 20% a dark smoke. Anything at 5% or below is a blackout for show cars only. The darker you go, the more your state’s rules matter.


One thought on “Tail Light Tint Explained: Film vs Spray vs Pre-Cut Vinyl Overlays”